It comes time of death by Radoslav Zilinsky
It comes time of death
"It comes time of death" by Radoslav Zilinsky
Hi, my name is Radoslav Zilinsky and my Internet nickname is radoxist. In this article, I would like to present to you the process of making my picture "It comes a time of death".
I'm going to tell you how I proceeded with the creation, modelling, texturing and composition. I will also pay a closer attention to some details which I find interesting.
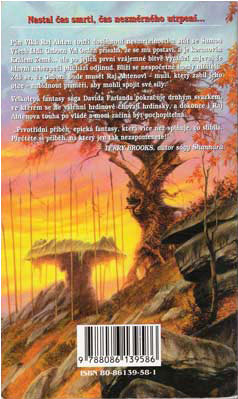
One of the most important things for me is, to have a good foundation, on which I can base my image. As an inspiration could serve a photo, nice picture or my own sketch. In this case, I was inspired by a small cover picture from one of the RUNELORDS series book.
So let's begin with the creation of the picture. My very first step during the creation was:1.Camera placement 2.Modelling of basic composition(mass) 3.Scene lightning. I find it very important to have this three steps at the beginning. It is something like making foundations for a scene. It is important, because everything that follows, will be affected by lightning and camera placement. It basically means that from now on, I can model and design materials for exact camera view and lightning. At this phase, I don't care how the model looks when I'm rotating it in the viewport, but I put more emphasis on how it looks from my camera view. The same applies to material design. Now it's time to show you, how the picture looks in the first phase.
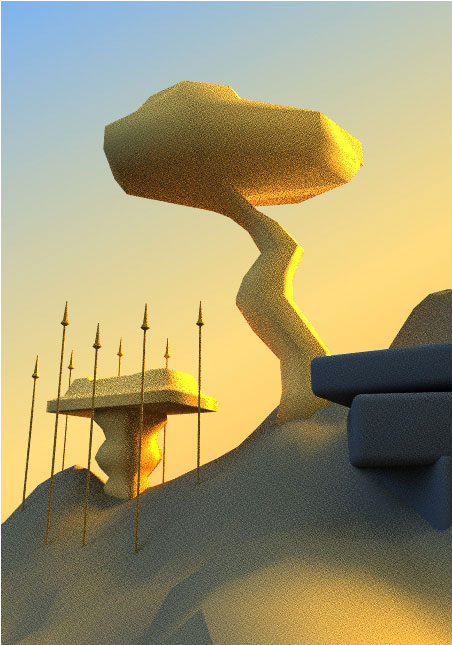
As you can see, the mass and the objects are only roughly modelled, but they are good enough to set 80% of the final lighting. Basically, there are three lights in the scene - on the right side there is one small rectangular light with orange colour and higher intensity and another much bigger light with blue colour and lower intensity on the left. The third sky dome light of red colour and lower intensity is oriented from right to left and its purpose is to add an extra colour variation to the picture. From now on, I will not move the camera at all.
At this point, I would like to talk about the chosen renderer and the method of rendering.
As for the rendering, I have used Vray renderer and as a method progressive path tracing (PPT), which was ideal for this picture. The reason for this is that in the scene there are many objects with Vray displacement, and this method handles them very good, especially in combination with object isolation (alt+Q). As a result, material testing was very fast. As an illustration, I rendered three pictures (tests). All of them were done in 4-5 minutes (and already in the first minute I could see most of the details), which is a very good result especially when talking about rocks and trees taking into consideration their detailed displacement. The rendering was with "Normal" Vray GI method (other than PPT), for example IRR + light cache, would take much longer than PPT. Here are the above mentioned test pictures.
So now we have set the basics of the picture so from now on I will describe the phase in which I have started to substitute objects for final models. For the latter I have unwrapped and made the materials right away. I have split everything nicely into layers - great thing, especially if you have a shortcut (I have shift+space), which helps you to open and close it.
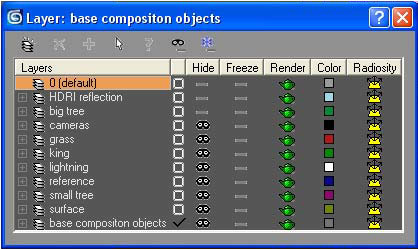
As for the material tests, in most of the cases I have used camera view as I have already mentioned before.
Now lets talk about the individual objects in the scene.
1. Surface:
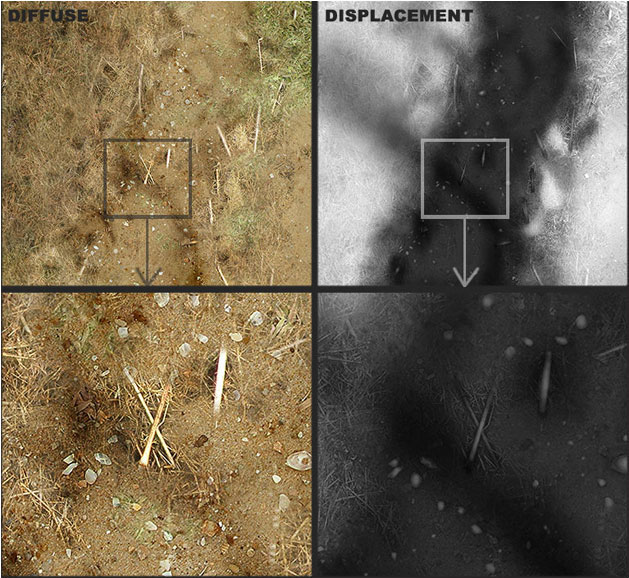
Here I would like to tell you how I proceeded in the creation of the texture for the surface and show you this texture as well. The whole diffuse texture was done from 5 different textures such as grass, earth, leaves etc. I loaded them all into Photoshop and drew the whole texture mainly using the clone stamp, dodge and burn tools and with different type of brushes and adjustments. From this diffuse texture, I made the displacement texture by desaturating it and using the burn and dodge tools. I have also used different selections from the diffuse texture made with colour range and than it was adjusted with brightness/contrast.
On the next picture you can see a little piece of this texture. The texture itself has 8000x8000pix resolution
 2. Grass:
For this I recommend my tutorial at http://www.3dtutorials.sk/index.php?id=72&page=
There are only two differences. The first one is that I used two kinds of textures for grass.
I put them together from Total Texture v10 cd. The second difference is, that it was not deleted with the texture, but by hand which is because it wasn't such a large area and I wanted to have it in the exact position as I wished.
3. Small Tree on the right:
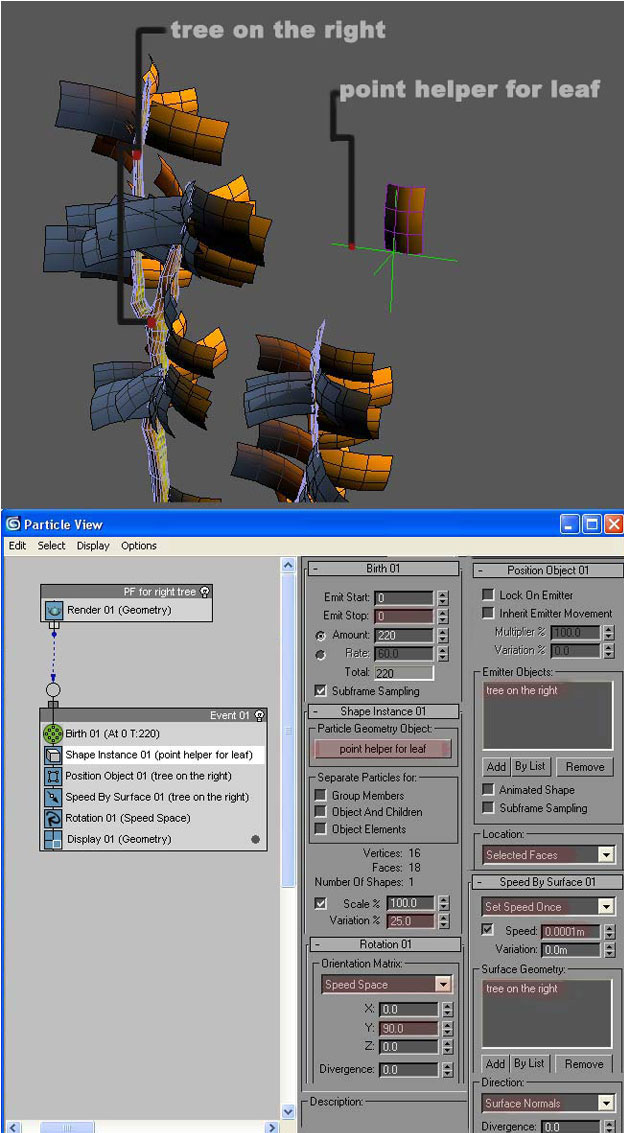
Here I found an interesting way on placing the leaves on this tree (I want to thank bontakun, who helped me with this). The procedure is that you make one leaf and then place a point helper at the bottom of its stem and link it to the leaf. Finally make a particle flow exactly the way as it is on the next picture. You will see, that all the leaves will be placed on selected faces of "small tree on the right" and they will be perpendicular to them.
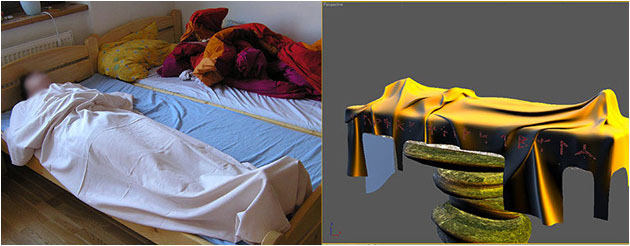
At the beginning I made this cloth only with diffuse and bump map, but fortunately, my friend Marek Denko persuaded me to model the whole cloth for which I want to thank him.
It's very important to have a good reference. One of my references is the next picture.
4. Big Tree:
I wanted this main tree to be really nice, and therefore I have spent most of my time creating it. The first thing was that I took a pencil and drew the tree in a way I wanted it to look in the scene. Than I scanned the picture in, took it to Max, placed it on a plane object and then place it in the scene where I wanted the tree to be. This sketch worked as a blueprint for me - but not for the front and side view, but only for the camera view! Generally speaking, I modelled this tree, so that it looked like the tree on the sketch. During the modelling I used two viewports - perspective and camera view.
3Dtutorials.sk recommendation:
To maximise the realism of your 3D rendering we recommend to use high quality photo textures from the #1 texture website www.environment-textures.com
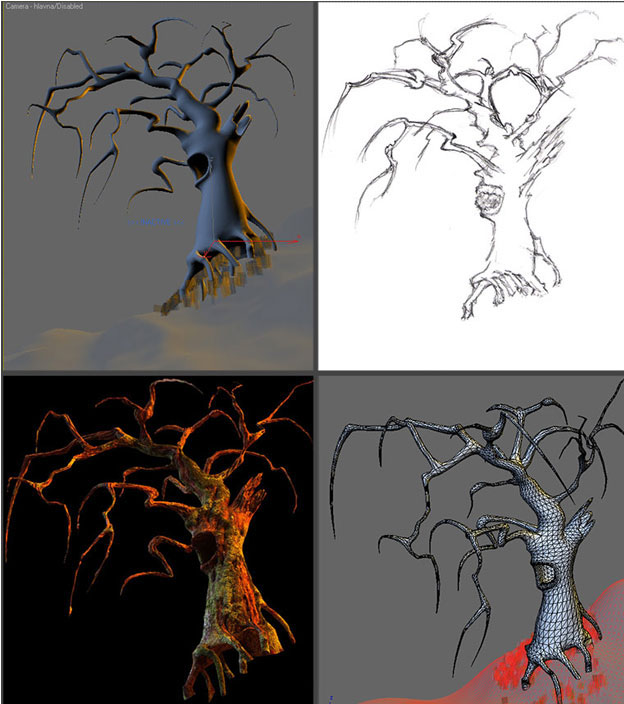
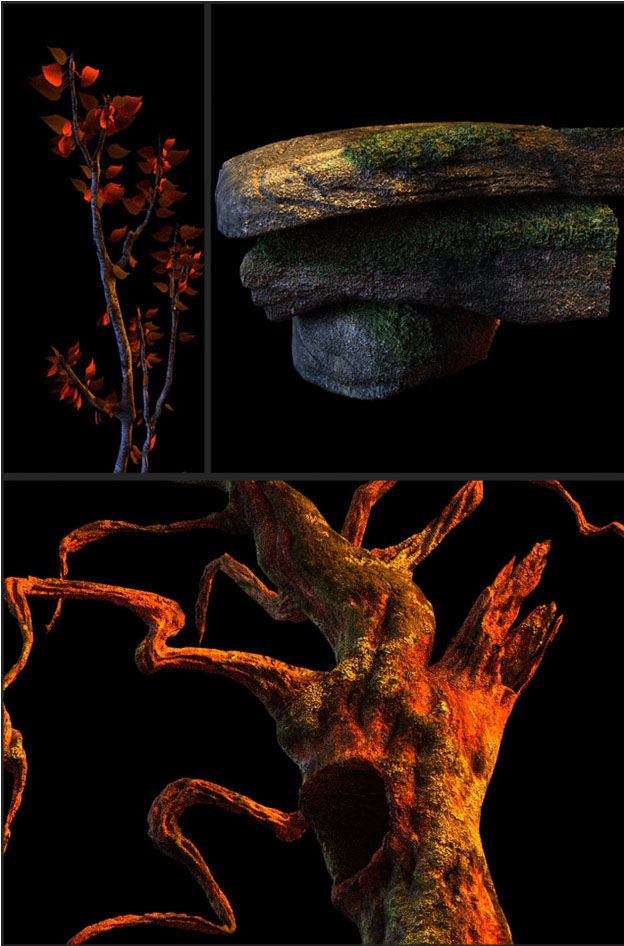
While creating the texture, I had first spent a few hours searching for interesting shots and nice details of trees, which I could use for the texture. By doing this I found very nice textures, from which I chose the most beautiful one.
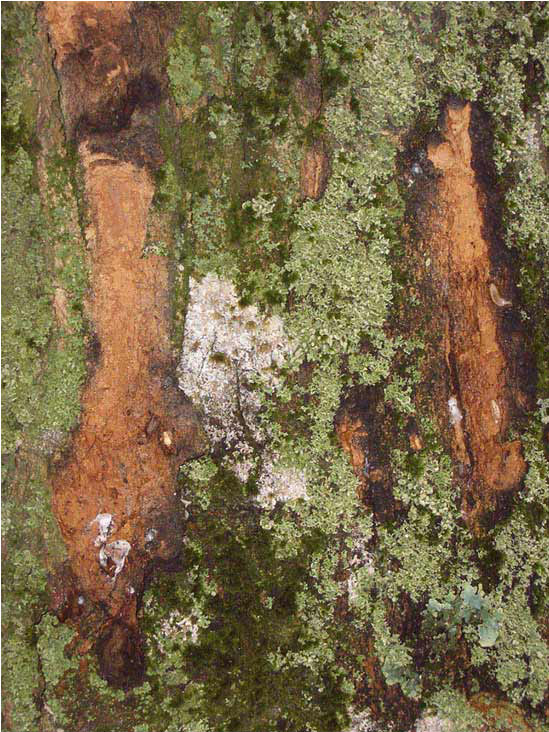
As you can see there are two kinds of moss and two kinds of bark. I find that getting a few references images makes the job of painting the texture so much easier. Here are the textures also with the unwrap.
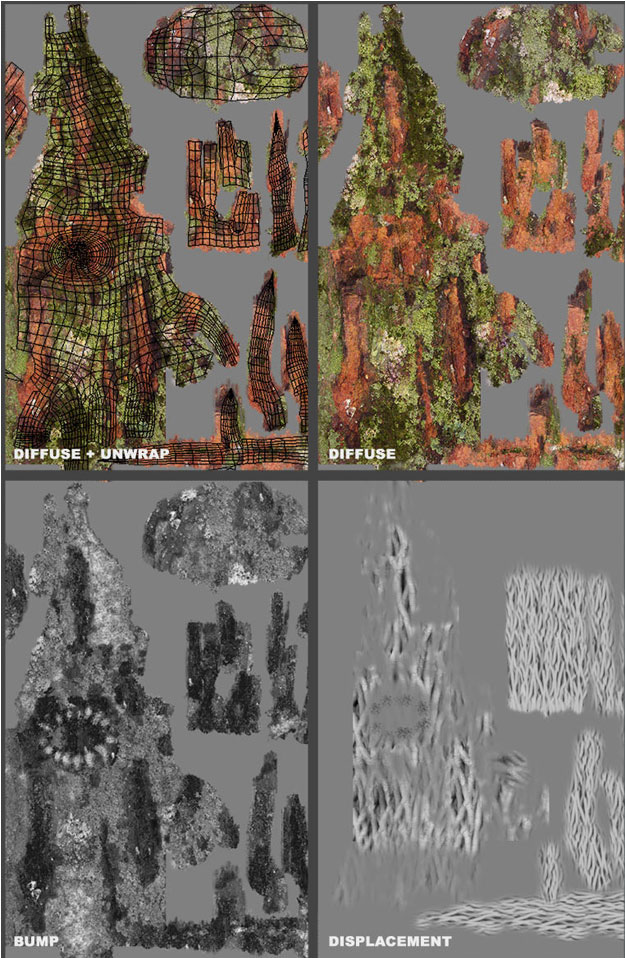
Here I would like to tell you how I made the displacement map, which I wanted to add as a line structure to the tree. As it was quite difficult to draw it in the Photoshop, I did it the other way and I simply modelled it from a plane object with a high number of faces by using paint deformation in editable poly. I did it three times on three different planes with different brush sizes and strengths. You can see something similar on the next picture (image a).
Further on, I transformed this model into a 2d displacement map. I did it by rendering a z-depth map from the top view to this object. So it became a map which I have then used to displace some parts of the tree. Here is the rendered z-depth map (image b).
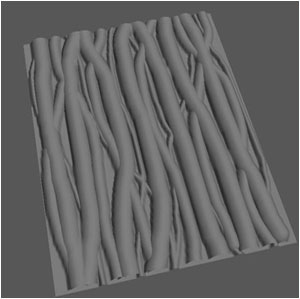
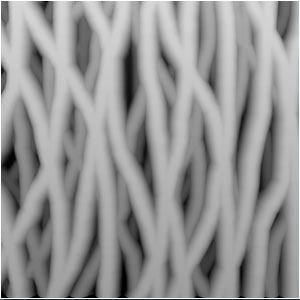
image a
image b
I made the long leaves with standard max hair and fur which was causing me a headache:) I had to redo them 4 times until I was fully satisfied. The small leaves were done with the same method as the small tree on the right.
When it was nearly finished, I rendered it out and connected it in Photoshop. This was just to check the composition again. After I checked it I decided, that it would be cool to have some darker bushes in the foreground to lead the viewer's eye into the scene. So I drew the shape directly on the picture in PS and then modelled the bushes from this. The last step was the creation of background and post production
Making the Background:
I spent some time searching on the Internet for nice skies and mountains. The final background is a composition of 5 different pictures. There was then added, a volume light and colour correction in the post production and final picture was done:)

I hope that this "short" making of was helpful to you and you learned something. I'm really looking forward to see some feedback, so don't hesitate to write me, if you have any question and just to say hello:)
(c) Radoslav Zilinsky, www.radoxist.com
Click for viewing tutorial on free3dtutorials .


