


PSYCHO MOM - modeling by Patrasciuc Cristian
Psycho Mom Project Overview PART 1: modeling
PSYCHO MOM project overview by Patrasciuc Cristian - PART 1Introduction - The Concept
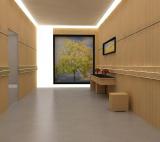
After making a few "clean" projects, like cars or beautiful living-rooms, I've decided to make a scene where I can test my texturing ability and, maybe, improve it. So I chose to make a dirty scene. As there are a lot of scenes with dirty walls or corners, I've also looked after something that is not so common, something that it can't be seen everywhere and also something that will shock 'the audience'.So I came up with this idea: a bathroom as a murder place. I'm not good at modeling human bodies, so I thought that it will be a good idea to make only the blood that came up with the murder and leave the rest of the murder story in mystery, so that every viewer can imagine it in his own way.
Modeling
All the objects from the scene are simple ones. They were obtained by just editing standard primitives, using the poly-modeling method.
3Dtutorials.sk recommendation:
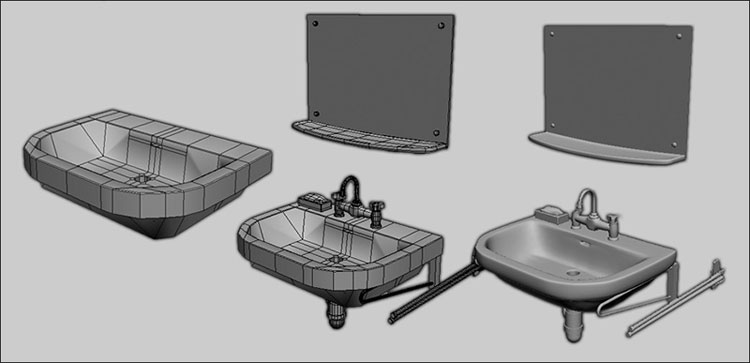
To maximise the realism of your 3D models we recommend to use high quality photo references from the #1 texture website www.environment-textures.comFirst, I've grouped my scene into three parts: the toilet, the sink and the tub. I modeled the objects for each part separately in a file. Then, I made the room: the wall, the floor (simple planes) and the window (just boxes and planes that I've retouched a little bit). When the room was ready I've merged the other three parts and scale them to fit the proportions.
To do this better I've created some boxes (the green ones in the image) with the real dimensions of the objects (for the toilet approx. 40x70x50, the sink 60x60x20, the tub 70x160x50) and scaled them until they fitted perfectly into the corresponding box.

Now, I'll show you a few stages during the modeling process. First of all, the sink. I made a box, I converted it to an editable poly and I gave it the basic shape of the sink (using just the cut and extrude basic tools). Then, I added the details, most of all made from standard primitives with a small retouch, like smoothing or a bit of blending. When it's necessary I add a MeshSmooth modifier to smooth things up and give realism to the objects. The same process was used to create the tub so I won't put any details as the objects are similar and I don't want to bore you.
For the toilet I'll detail a bit the process so you can understand it. If you are an advanced 3d artist you can skip this part, as it was made for the beginners. First of all, create a cylinder with 7 segments on height and 8 sides.

Move the vertices so they fit a basic toilet shape, delete the top face and add a Symmetry modifier, so you don't have to bother with both halves of the objects.

Now select the top most edge loop and scale it in order to create a new one inside the cylinder. If it's necessary adjust the position of the new vertices.

With the new created edge loop selected hold Shift and drag it downwards to create the inner part of the toilet.
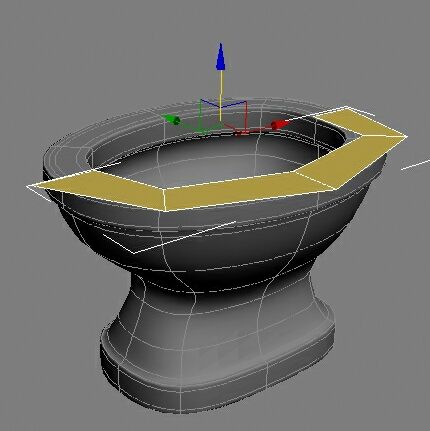
Select the faces marked with red in the image and extrude them using the 'Local Normal' method. Repeat the process for the bottom of the toilet.

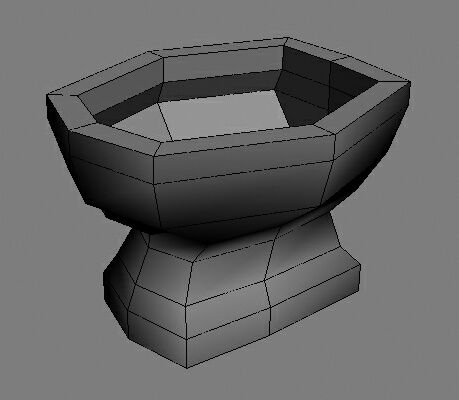
Now you should have something like this.

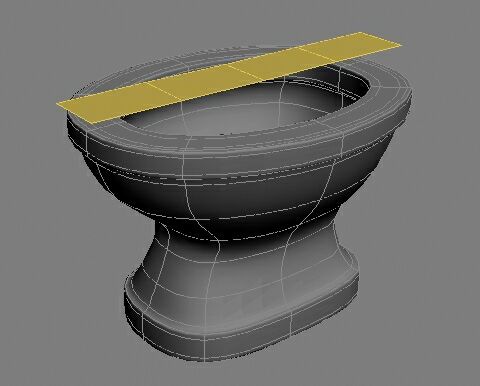
As we will apply a MeshSmooth modifier we want some edges to remain a bit 'hard'. So, select the edge loops marked with red in the following image and chamfer them using a low value (I used 0.1, but it depends on the scale of your scene and the units that you're using).

Now the mesh it's ready to be smoothed. Apply a MeshSmooth modifier from the Modifier List. Set the Iterations to 2 and you should have a nice toilet like the one in the image.

Let's pass to the toilet seat. Create a plane with 4 segments.
Convert it to Editable Poly and move the vertices so they fit the toilet shape.
All you have to do now it's to add a Symmetry modifier, a Shell modifier (with 3 or 5 segments) to give the plane a bit of height, then a MeshSmooth modifier with 2 iterations. Now you have a brand new toilet seat!

In the same way I created the other part of the toilet seat: create a plane, give it the basic shape, ad a Shell and MeshSmooth modifier. Easy, isn't it? 

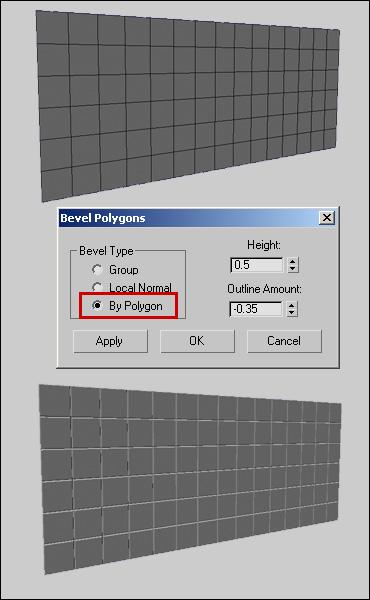
The rest of scene (the walls and the window) is pretty simple: just basic planes or boxes. Before finishing the modeling process I thought that it will be more realistic if I would model the faience/slate too, not just bumping it from the texture. In order to do that I made a plane with 15x6 segments, I converted it to editable poly and add a little bevel on each polygon (see the image for more details - the numbers must be chosen according to your needs).
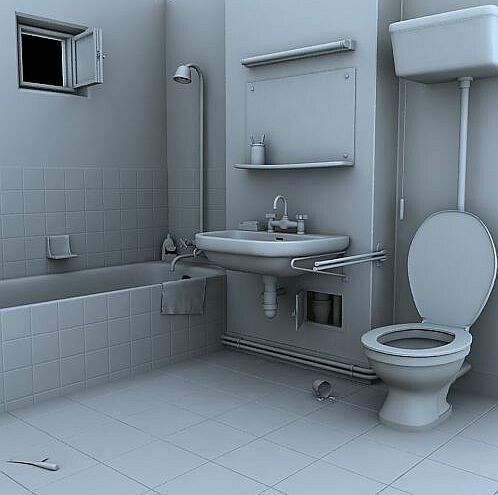
The towel is a plane with reactor cloth simulation, and the other objects like the shampoo container and the soap on the sink are just standard primitives with a little bit of smooth. They were not modeled in details as they are far from camera and I also tried to keep the poly-count at a low range. The knife and the broken glass are objects from my library (they were modeled as simple tests when I began to learn 3D Max). So the modeling process is ready. Here is a clay-render of the scene.
(c) Patrasciuc Cristian, http://calligrapha.go.ro
Click for viewing tutorial on free3dtutorials .